A guide to creating a new Snapshot for an individual.
Follow the easy steps below to create a new individual Snapshot. If you’re looking to create a new Groupshot see the Creating a new Groupshot article.
Step 1
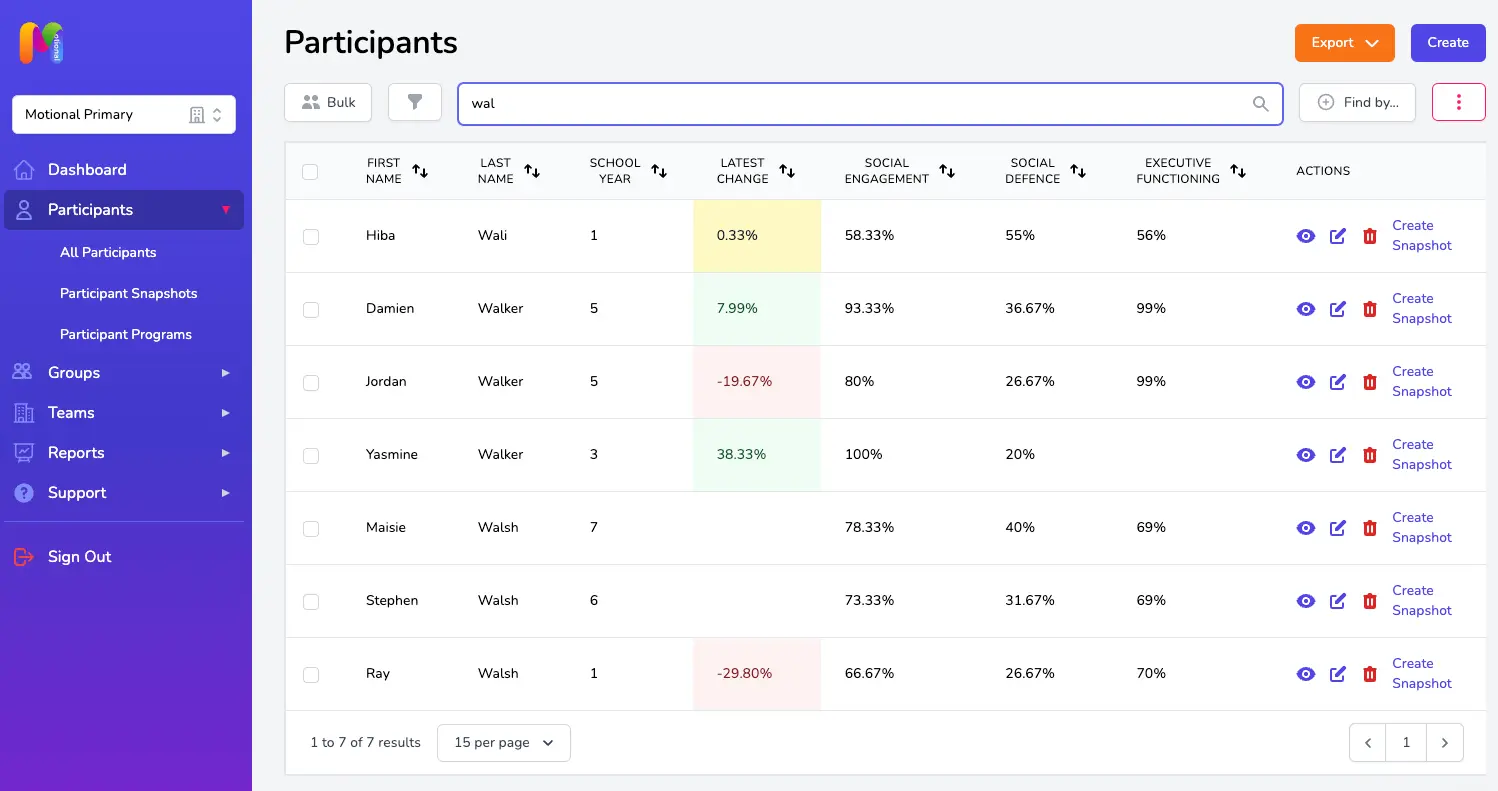
From the main sidebar, click Participants and All Participants. This will take you to the Participants page where you can use the filter, find and search options to identify the Participant you wish to Snapshot.
Step 2
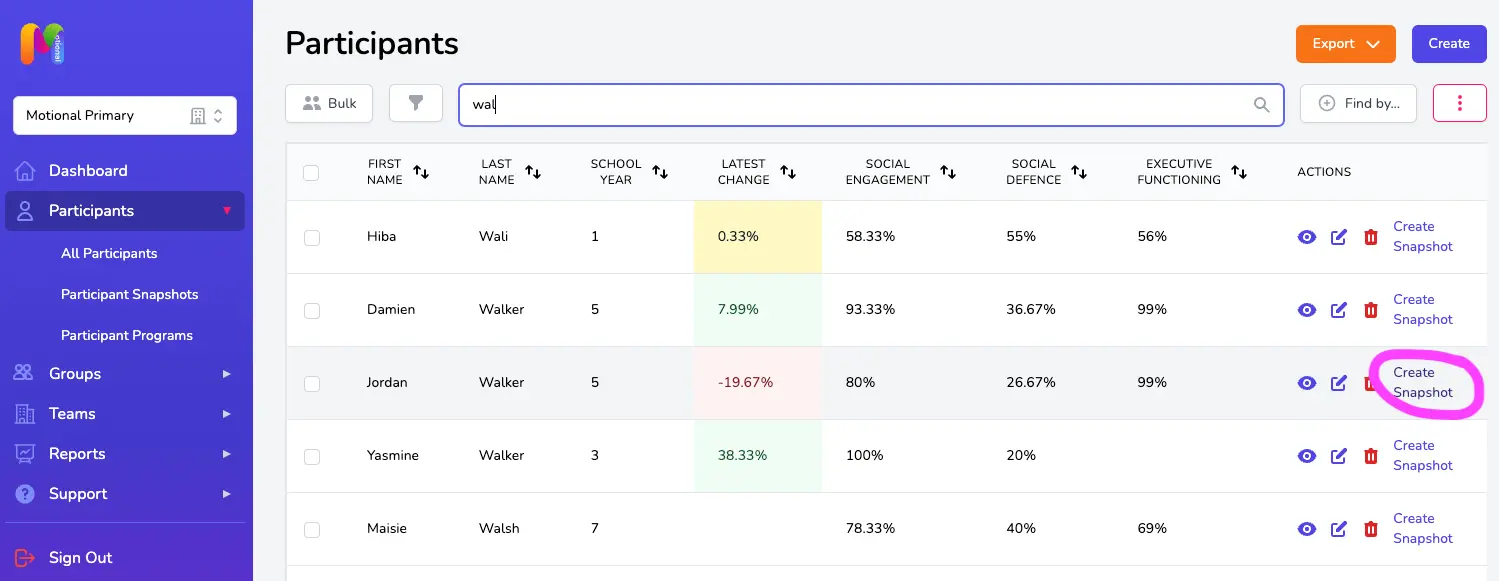
Click on the Create Snapshot link in the actions column to the right of the Participant's entry in the table.
Step 3
Select Universal or Comprehensive level:
- Universal Snapshot
The easiest and quickest Snapshot, designed in particular for work with larger groups such as classes, and for individuals where time is more limited. The Universal level has approximately 40 questions within it. - Comprehensive Snapshot
A more in-depth Snapshot, designed in particular for work with individuals and small groups. The Comprehensive level has approximately 70 questions within it and will give you a more detailed and focussed Snapshot of the Participant’s current level of emotional development, and in turn will enable you to better support them in 1:1 work and small group work.
Both the Universal and Comprehensive Snapshots look at Social Engagement, Social Defence and Executive Functioning to provide a ‘whole-brain’ approach to supporting and measuring wellbeing.
Step 4
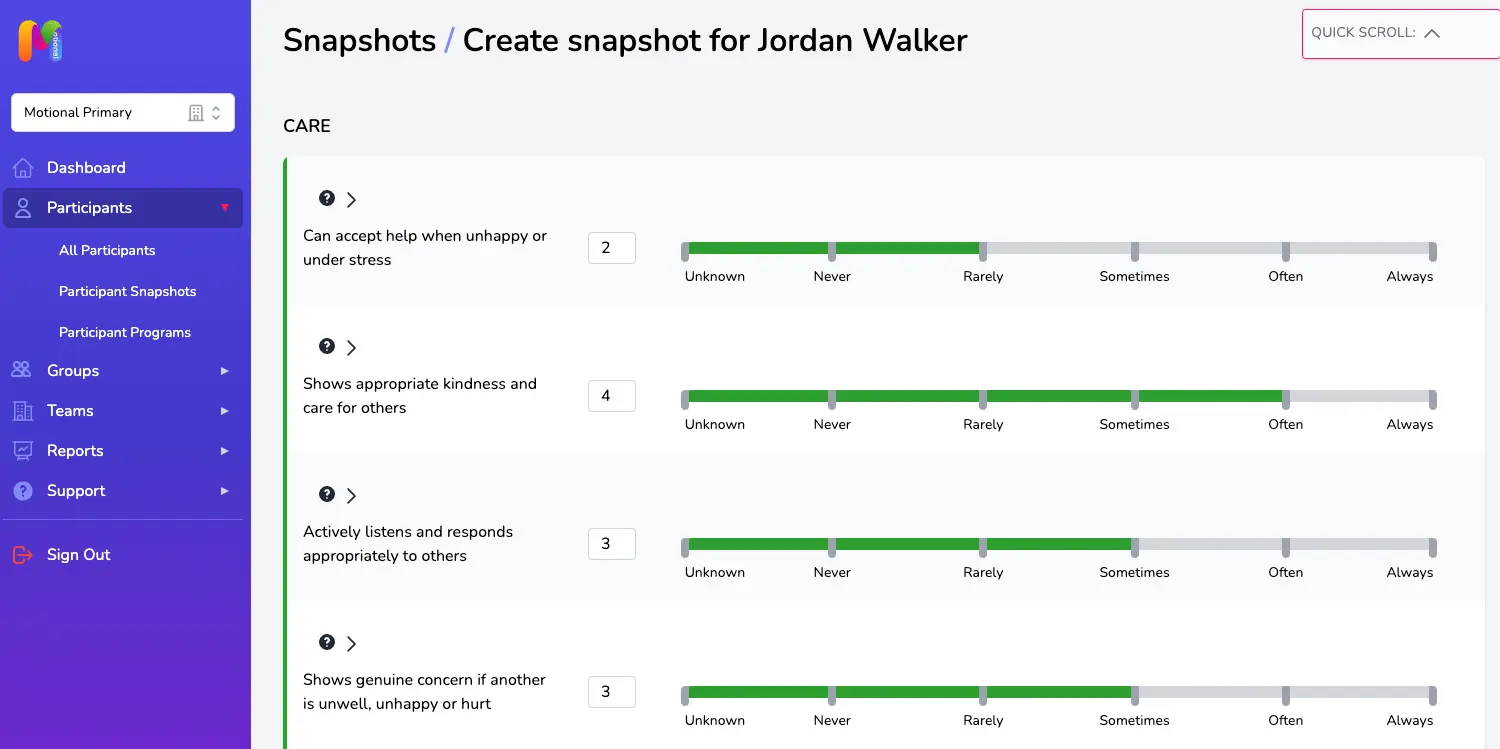
Complete the Snapshot for each of the 11 Subdomains. Try to answer each question as accurately as you can. If you click on the arrow next to each question, you will find more detailed guidance on what "Always" or "Never" might look like. These neuro-affirming descriptors support questionnaire completion when working with children who have specific additional needs, including SEMH, Autism, SLD and PMLD.
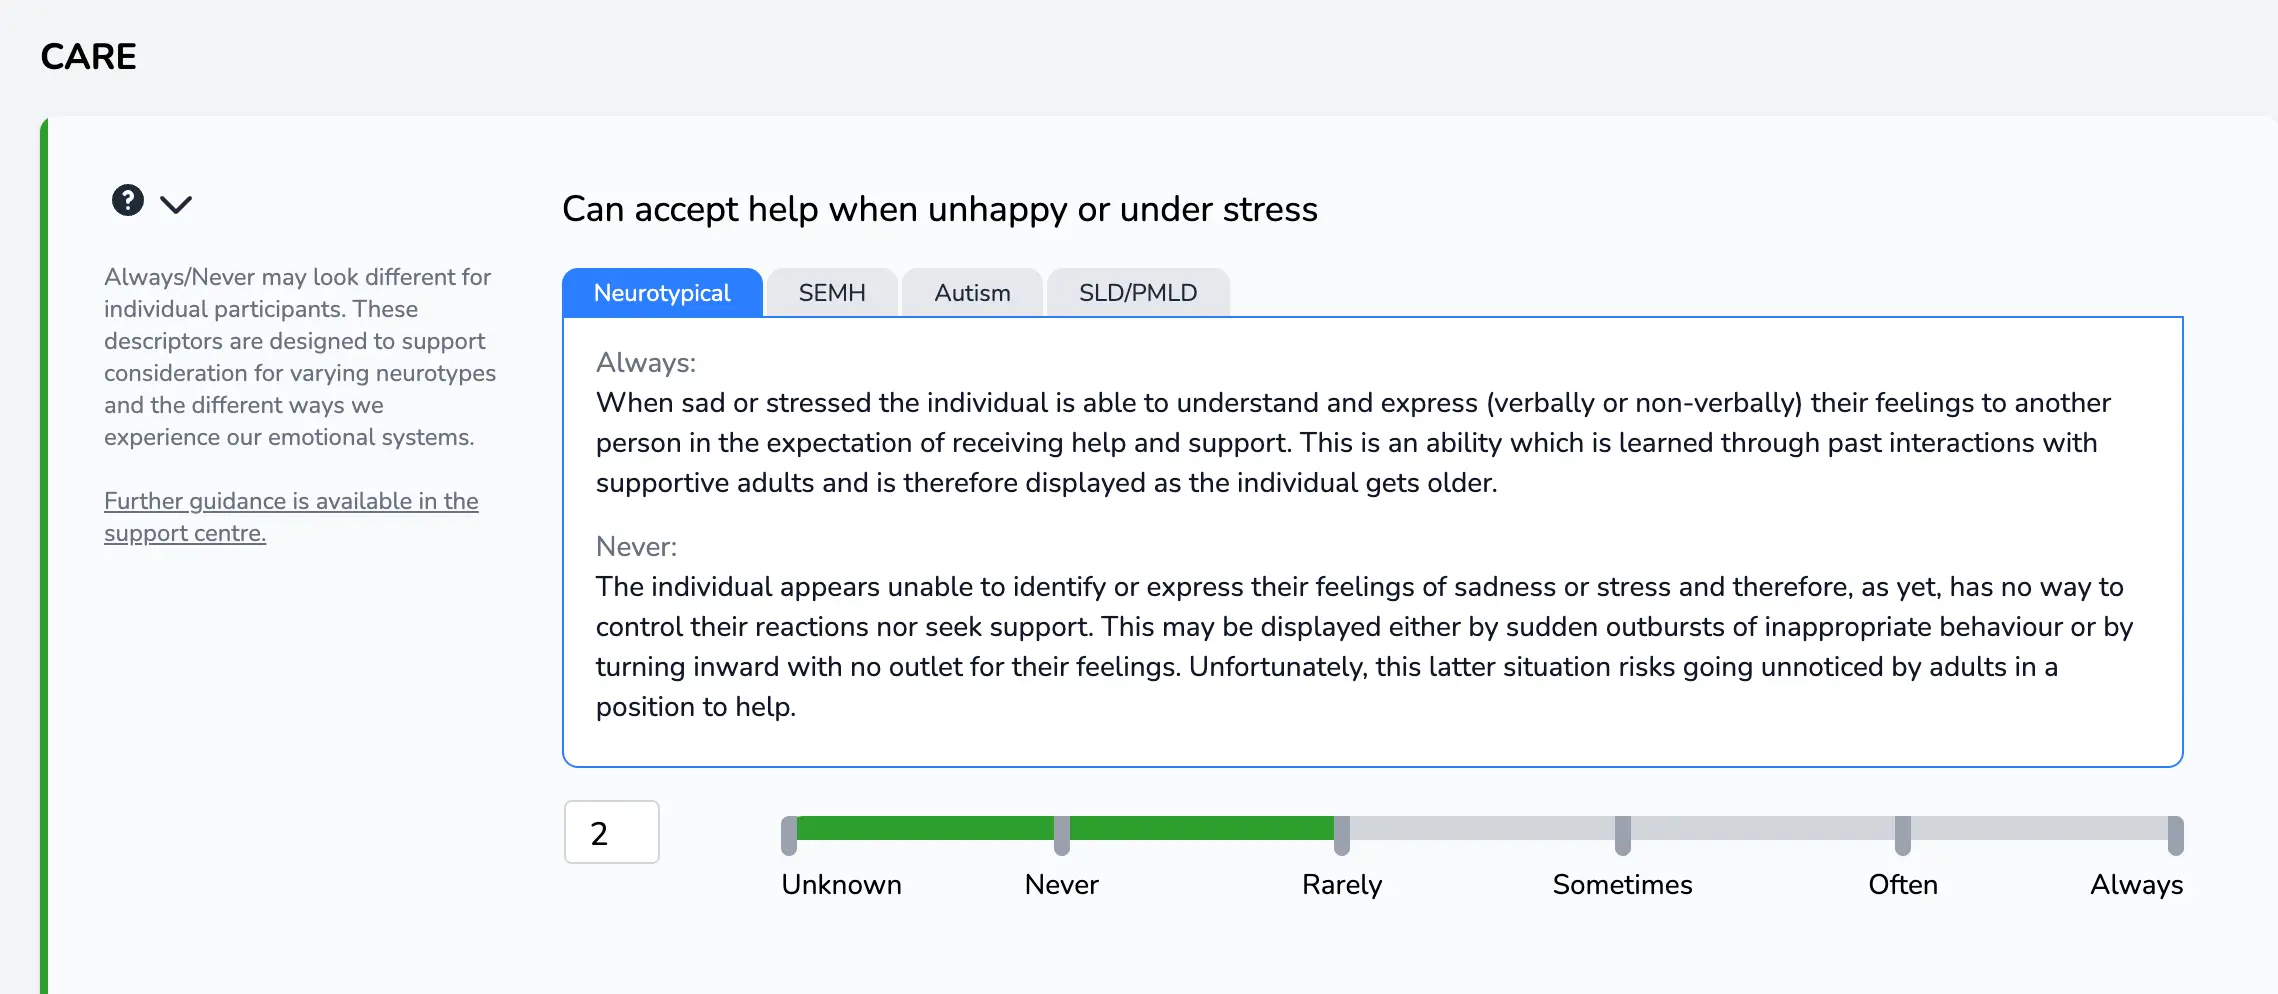
To select your answer to each of the statements simply click on the sliding bar. You may also enter a number into the box to the left of the slider and use the tab button on your keyboard for speed. Tab to the drop-down arrow and hit space and it will expand so you can see the “Always” and “Never” advice. Shift+tab will take you back a step.
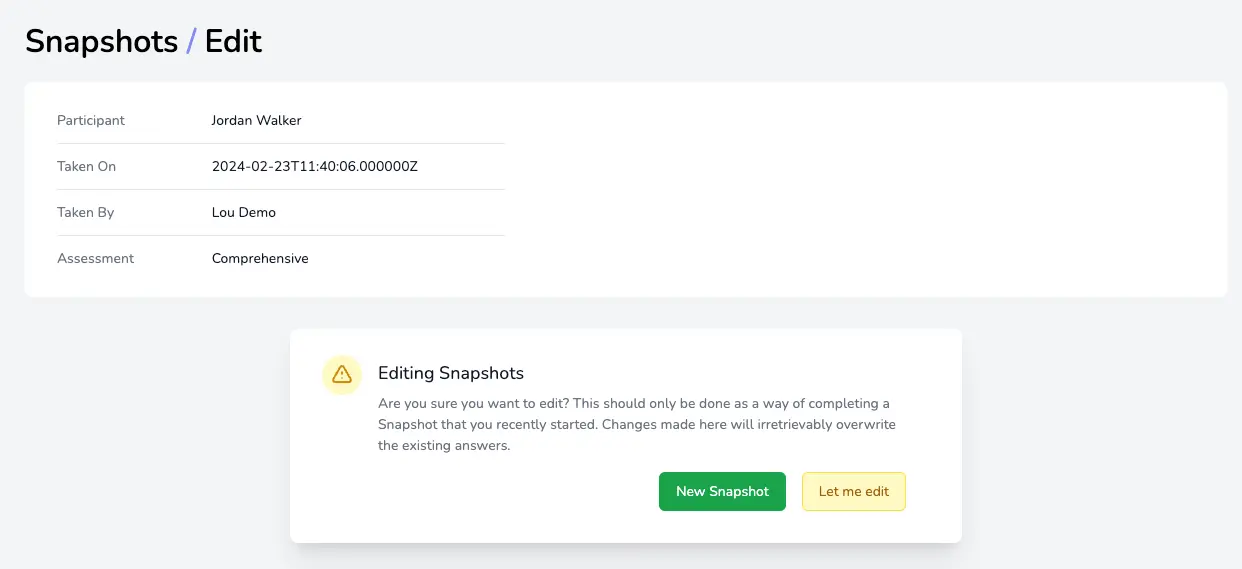
Snapshots save automatically as you go, so there's no save button. This also means if you have to stop part way through and leave your computer, all you need to do is logout. Your partial Snapshot will be waiting for you on the Snapshots page when you next login, and you can carry on where you left off by clicking on the edit icon in the Actions column on the right.
Step 6
Once you have completed your assessment for all Subdomains, you can move on to the results page if you want to by clicking on the View Results button at the bottom of the page. You can view the results at any time by clicking on the view icon in the Actions column next to the relevant Snapshot on the Snapshots page. Don't forget you can use the edit icon on that page too if you need to finish off a Snapshot you previously started, or need to make minor edits.
Step 7
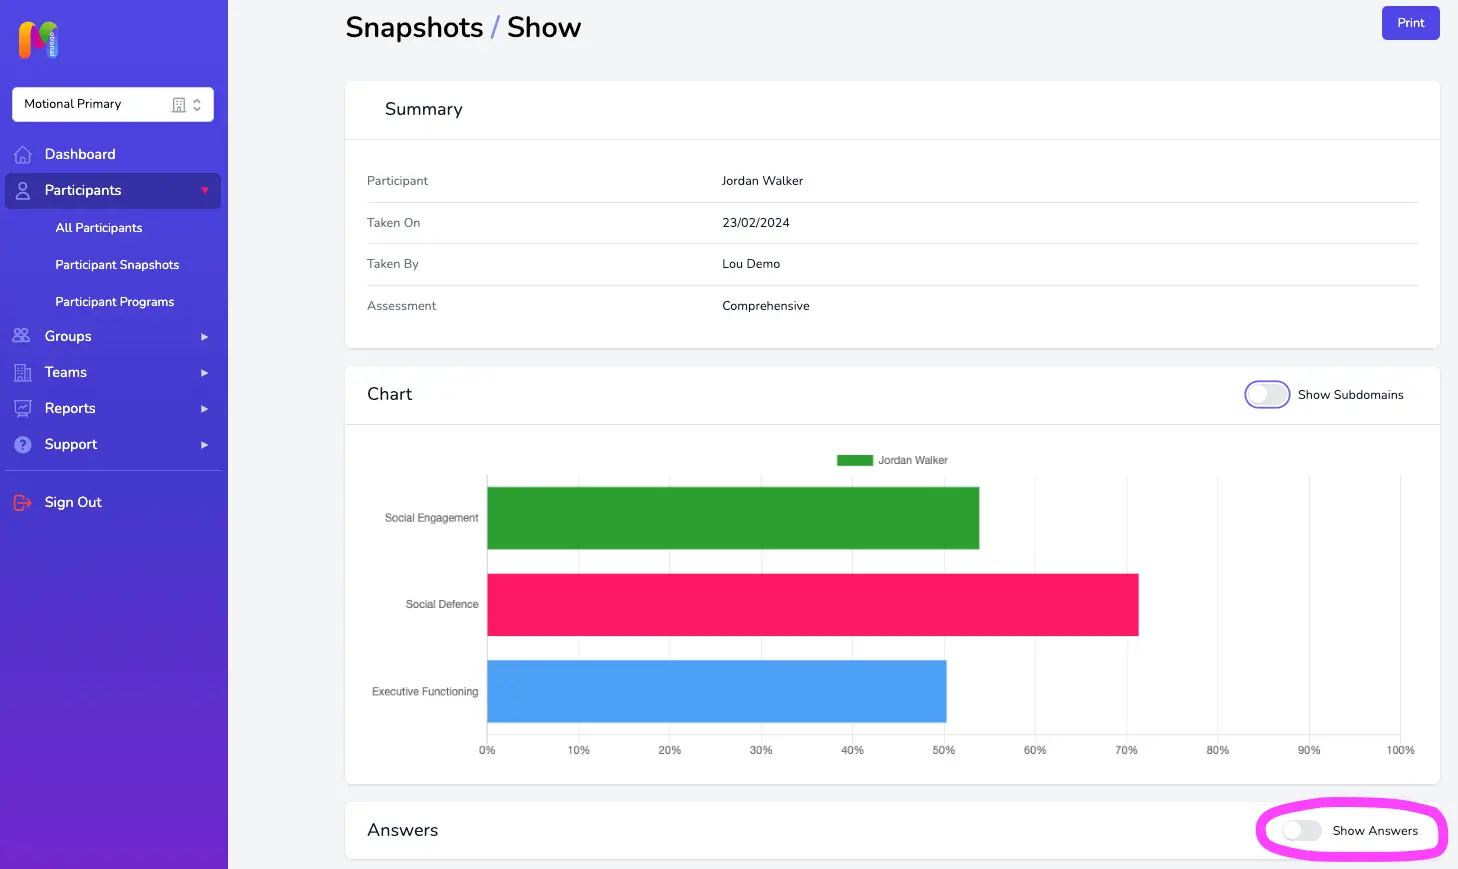
Your results are now displayed.
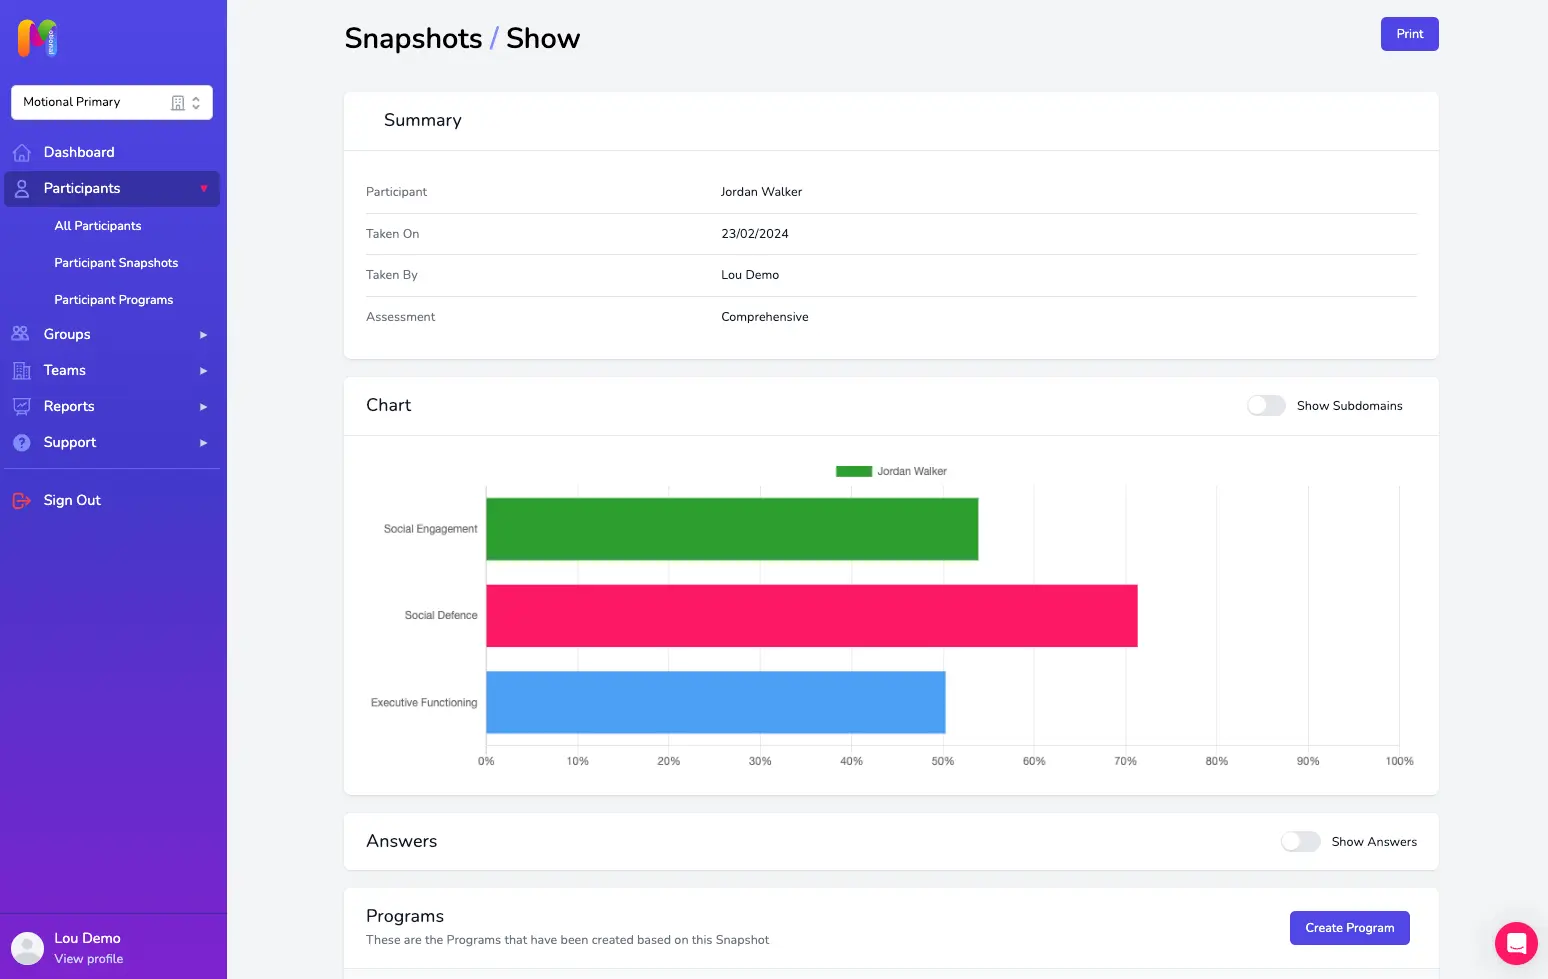
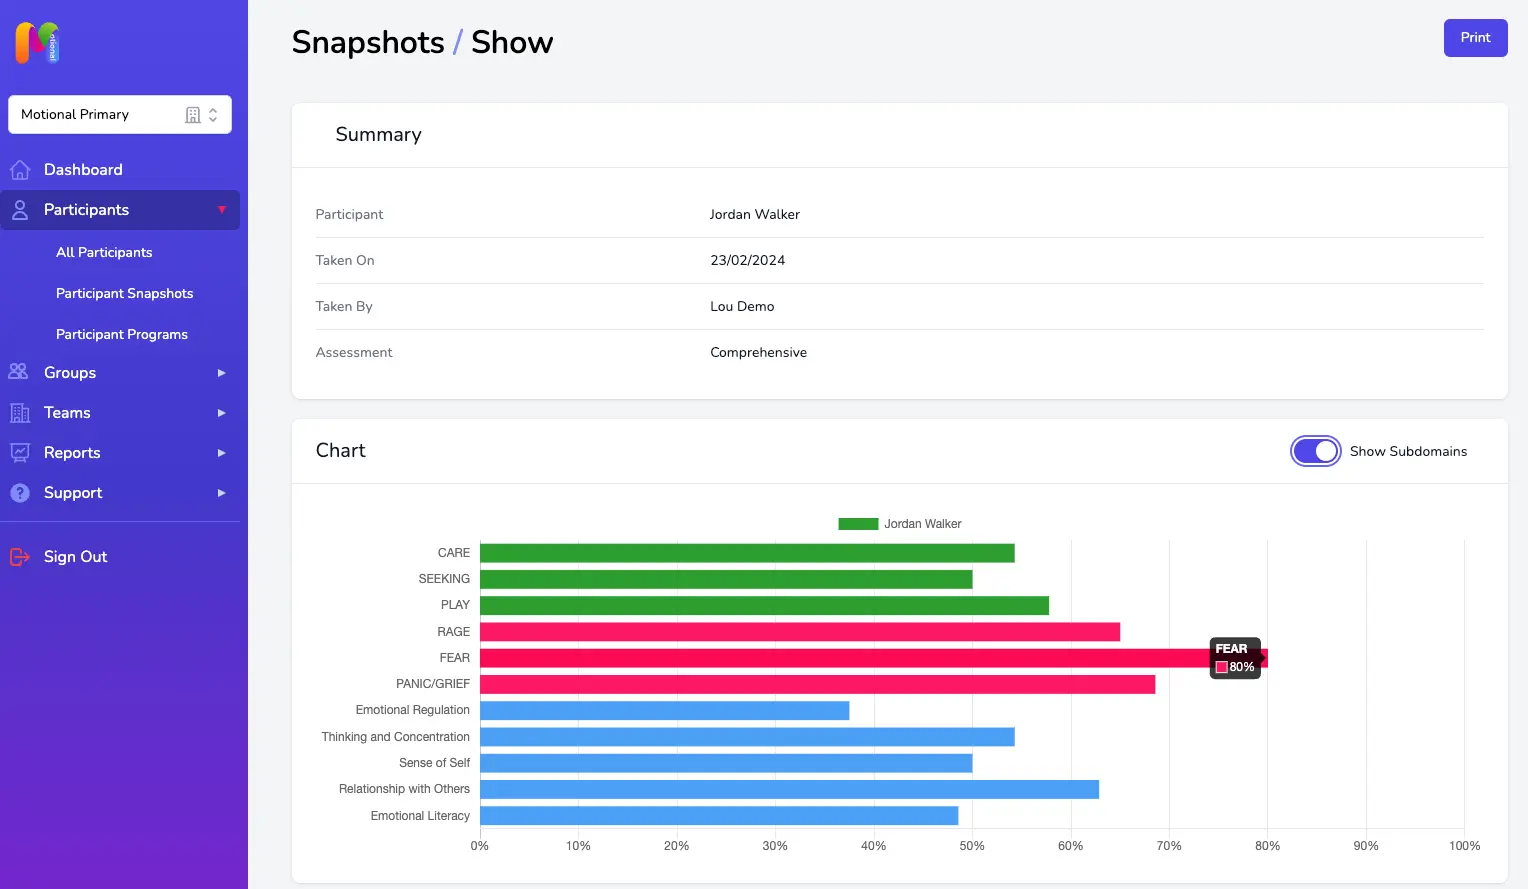
The default view shows the Domain scores, but you have the option to see more detail by selecting the Show Subdomains toggle at the top right of the chart:
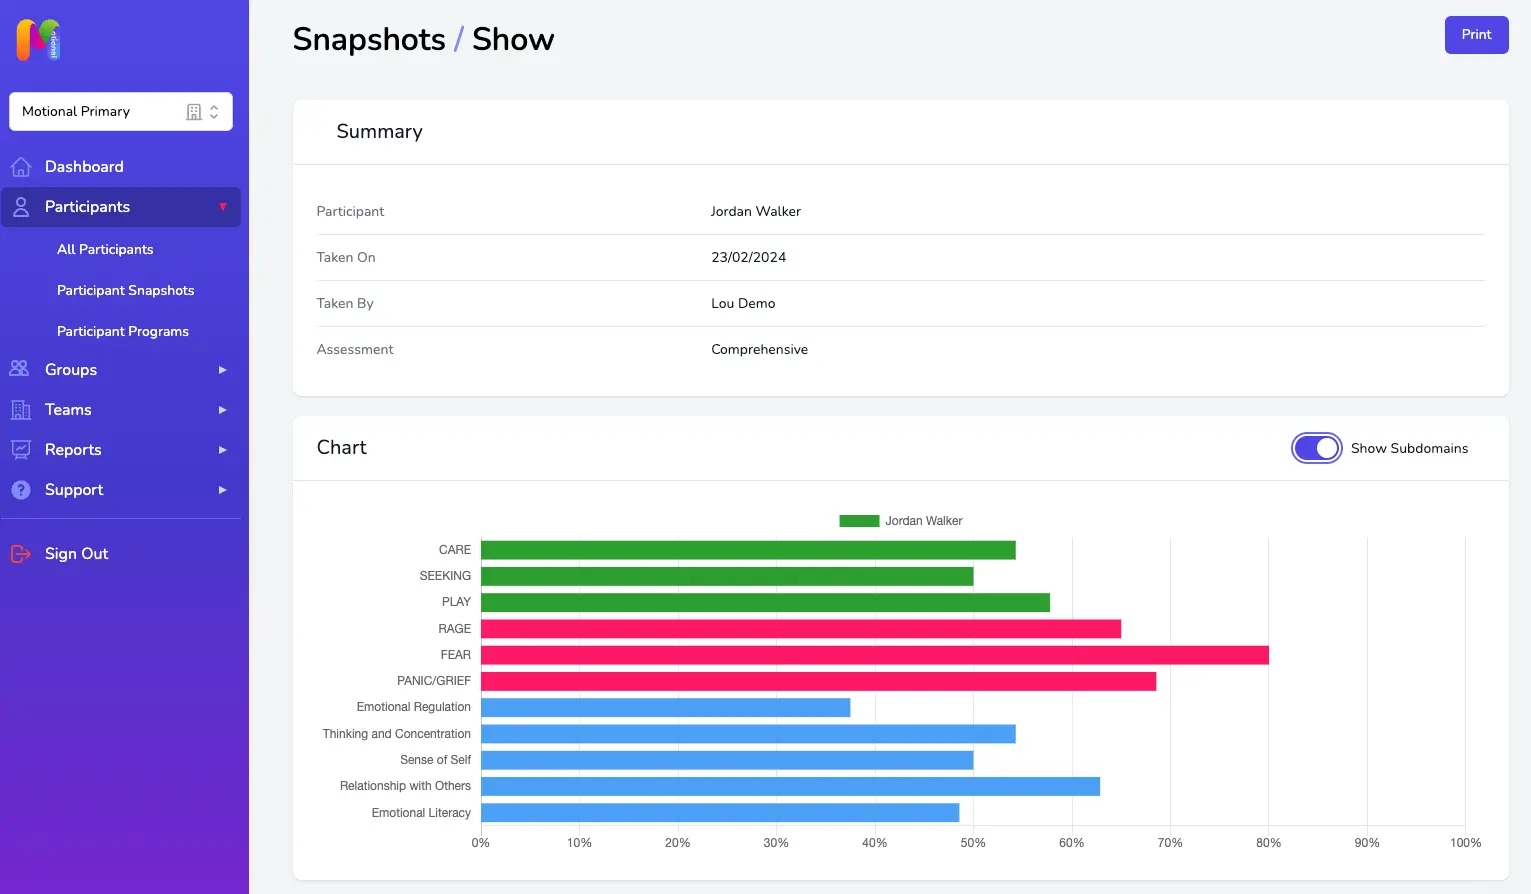
If you hover over any line within the graph you will see a box detailing the score for that particular Domain/Subdomain. Don’t forget that for RAGE, FEAR and PANIC / GRIEF (the Social Defence Subdomains), a lower score is better.
A record of the answers submitted for each of the 11 Subdomains is revealed if you click the show answers toggle.
Next Steps
Now you have created your new Snapshot, you can create a New Program for the Participant.