A quick guide to editing Groups
The edit option on the Groups page is there for those times when small changes happen along the way. Editing Groups should be done cautiously so you can make sure you continue to get the best out of any “change over time” information and other reports about the Group. Check out our
Making changes to Groups
article to learn about what to do in different scenarios.
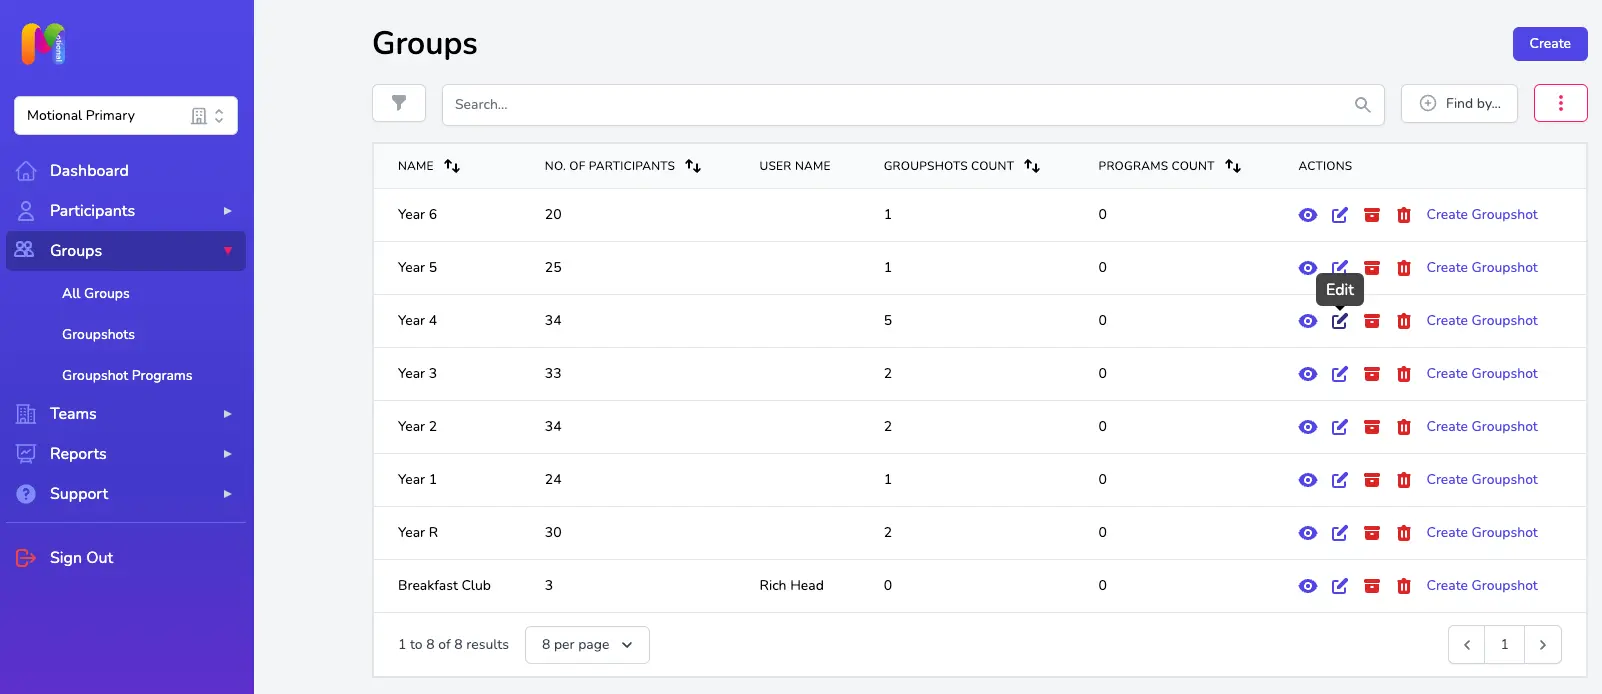
To edit an existing Group, head to the Groups page and find the Group you want to edit. If you have quite a lot of Groups you can use the search bar at the top to help you. Click the edit icon within the Actions column on the right hand side of the Groups table.
Editing the Group Name
You can edit the Group Name in the top box if you need to. This would usually be used in cases where you want to make a tweak to the name, or where you need to rename the Group but the Participants within it are the same (e.g. where a class moves together from Year 3 to Year 4).
Editing the Group Description
The Group description is optional and is only visible within this screen, but can be helpful for you and other Team Members to distinguish the Group if the Group Name alone isn't enough.
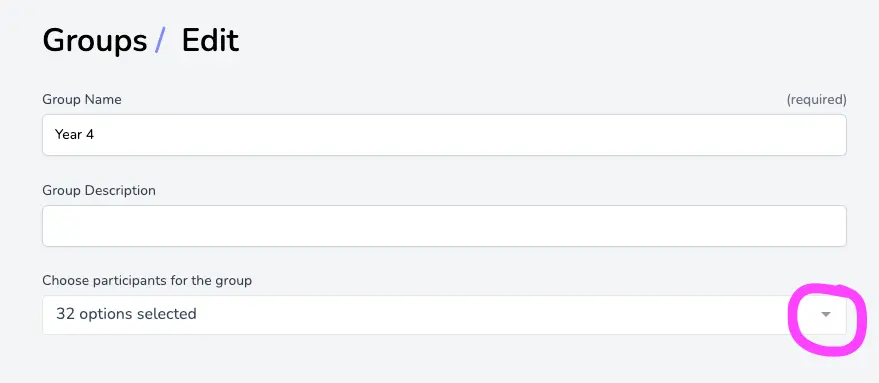
Editing the Participants in the Group
To make changes to the Participants within the Group click on the drop-down arrow within the Participants field.
The current Participants in the Group will be listed and you can click on the cross next to any name to remove them from the Group. To add other Participants, click or press enter on their name in the list, or you can use the search bar to find them.
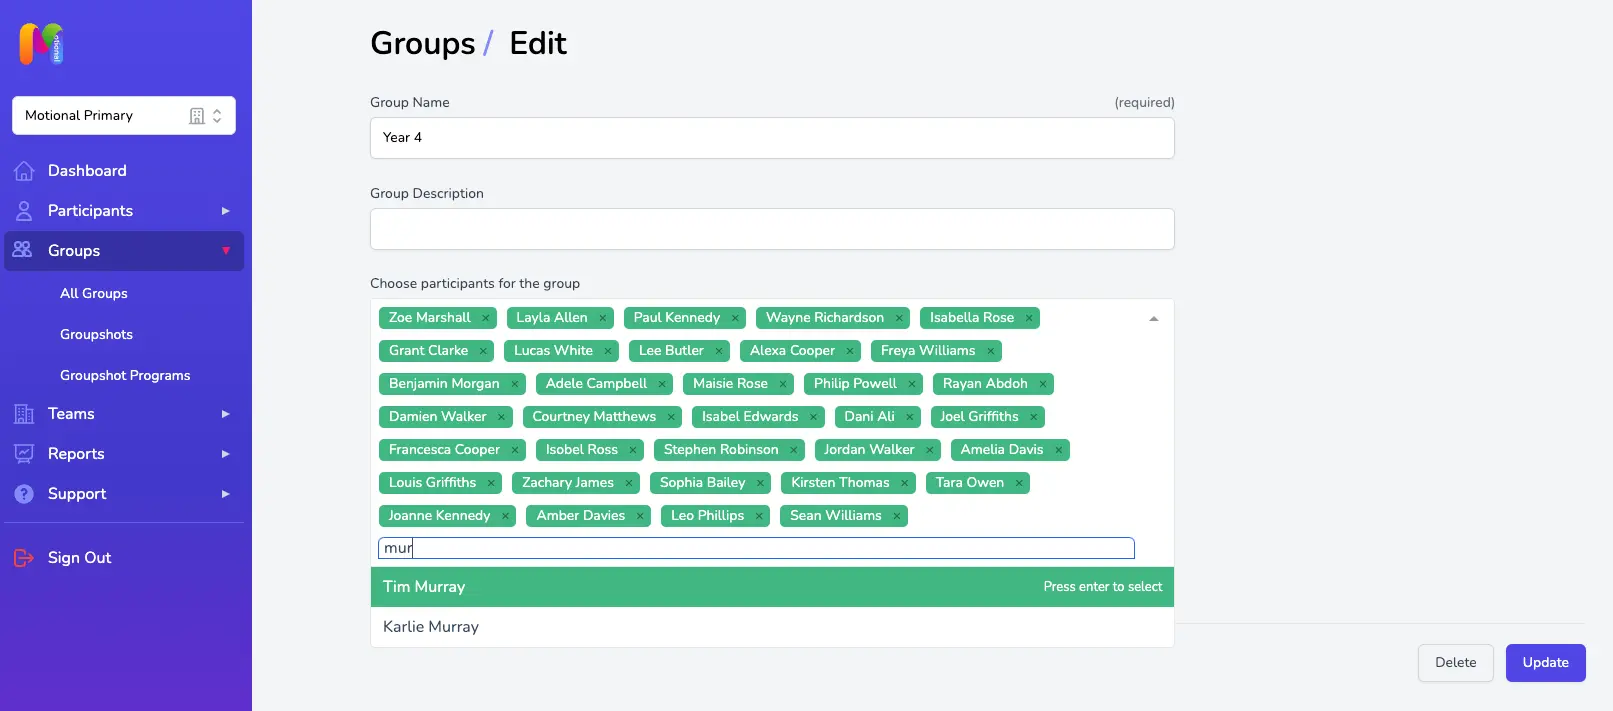
Make your changes and don’t forget to click Update!