A quick guide to creating a Groupshot for your class or group.
If you are unsure what a Groupshot take a look at the
What's the difference between Snapshots and Groupshots?
article.
Follow the easy steps below to create a new Groupshot. If you're looking to create a new Snapshot for an individual Participant you'll need the
Creating a New Individual Snapshot
guide instead.
Step 1
Make sure the Group you want to do a Groupshot for has already been created! If you haven't done that bit yet take a look at the How to create a New Group article.
Step 2
Click on the Groups tab in the blue/purple sidebar and select All Groups. This will take you to the Groups page, where you can view existing Groups and create a new Groupshot.
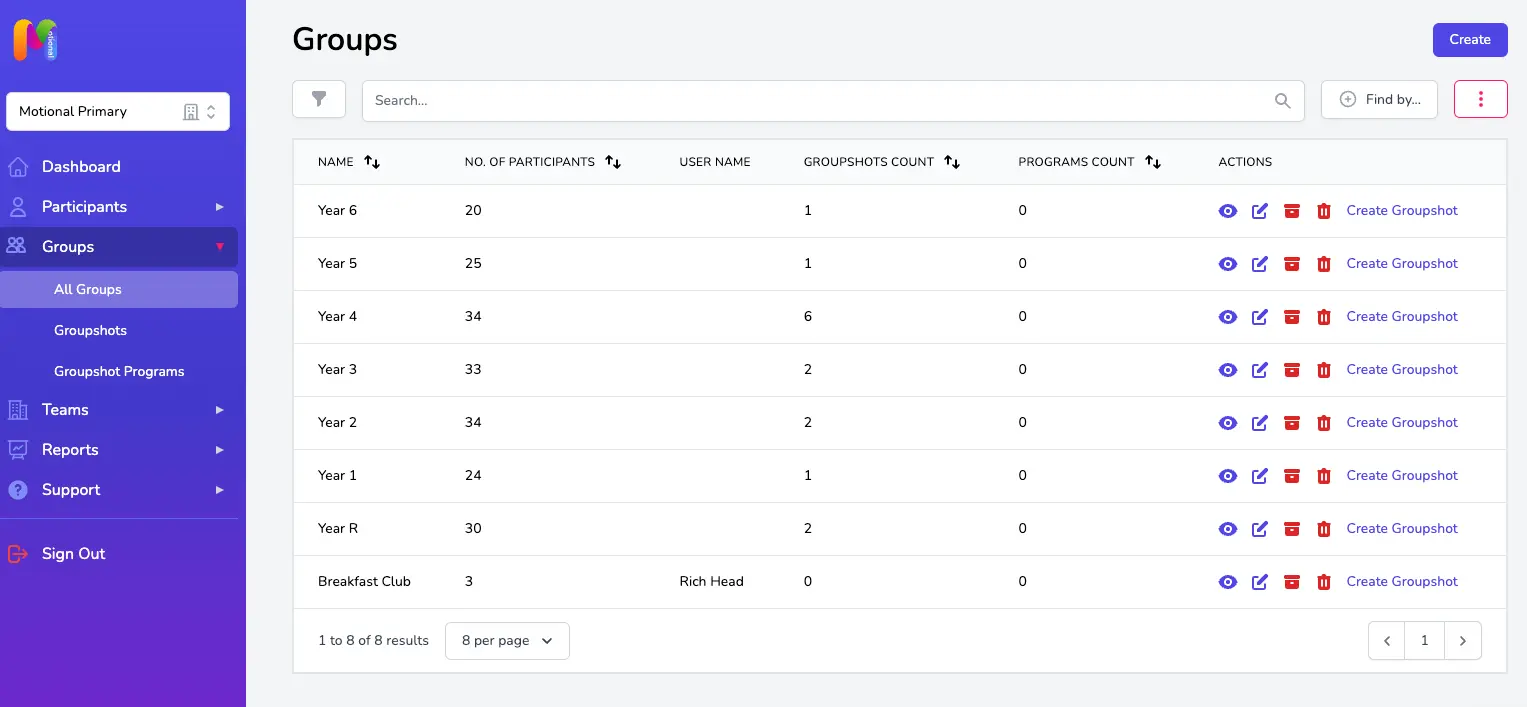
Step 3
Find the Group you want to create a new Groupshot for and click on the Create Groupshot link in the Actions column on the right-hand side of the table.
Step 4
Select Universal or Comprehensive level - if you are unsure of the difference see the article What's the difference between Universal and Comprehensive Snapshots / Groupshots?
Step 5
Complete the Groupshot for each Group Participant for each of the 11 Subdomains. To move between each Subdomain, you can click on the relevant section in the index at the top of the page (the number for the Subdomain you are currently completing will be highlighted), or there's a natural 'Next: Subdomain' button at the end of each section
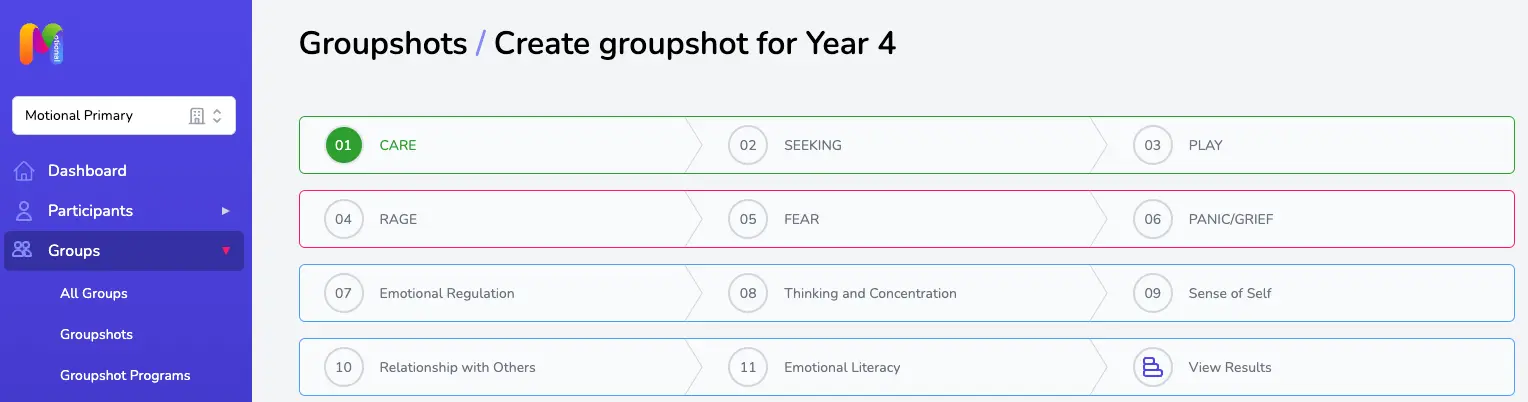
To select your answer to each of the statements, simply click on the scale bar. Try to answer each question as accurately as you can. If you click on the arrow next to each question, you will find more detailed guidance on what "Always" or "Never" might look like. These neuro-affirming descriptors support questionnaire completion when working with children who have specific additional needs, including SEMH, Autism, SLD and PMLD.

You also have the option to enter a number into the box to the left of the slider and use the tab button on your keyboard to navigate your way down the page. This can be speedier and particularly helpful for large Groups, e.g. for a class. Tab to the drop-down arrow and hit space and it will expand so you can see the “Always” and “Never” advice. Shift+tab will take you back a step.
Groupshots save automatically as you go, so there's no save button. This also means if you have to stop part way through and leave your computer, all you need to do is logout. Your partial Groupshot will be waiting for you on the Groupshots page when you next login, and you can carry on where you left off by clicking on the edit icon in the Actions column on the right.
Step 6
Once you have completed your assessment for all Subdomains, you can move on to the results page if you want to by clicking on the View Results tab in the index at the top of the page.
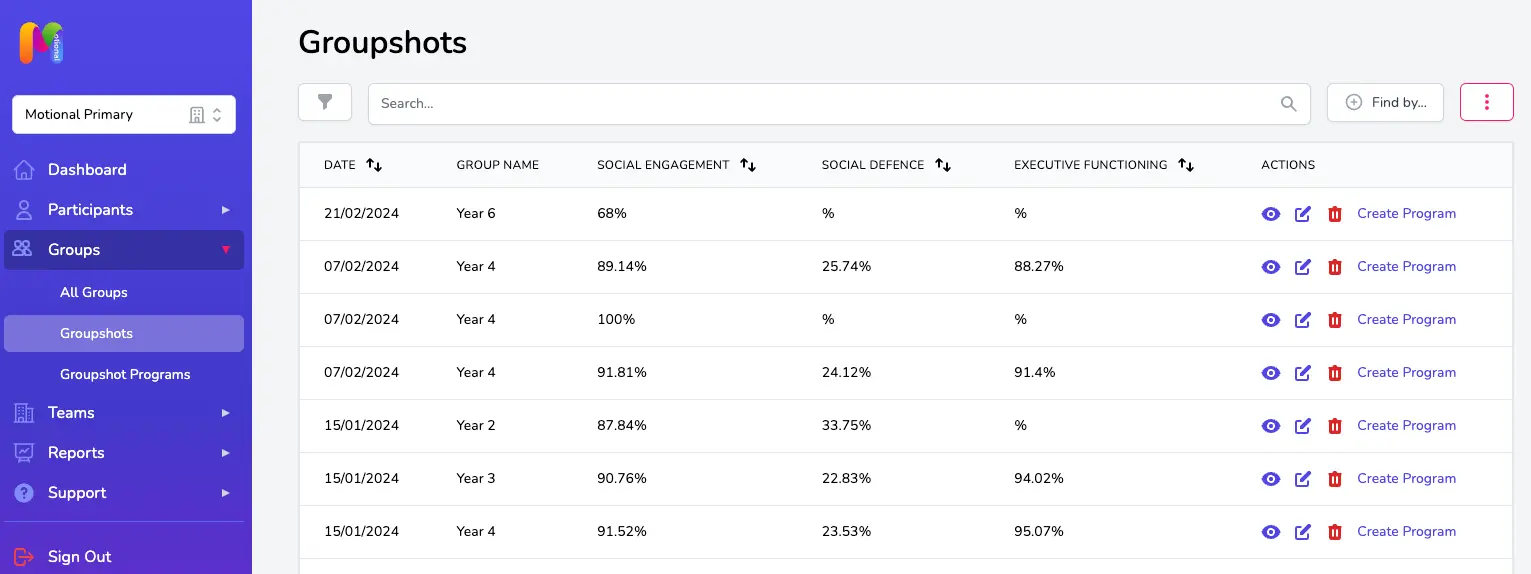
You can view the results at any time by clicking on the view icon (the little eye) in the Actions column next to the relevant Groupshot on the Groupshots page. Don't forget you can use the edit icon on that page too if you later find that some of the answers are missing or if you've missed a Participant from your Group!
Step 7
Your results are now displayed.
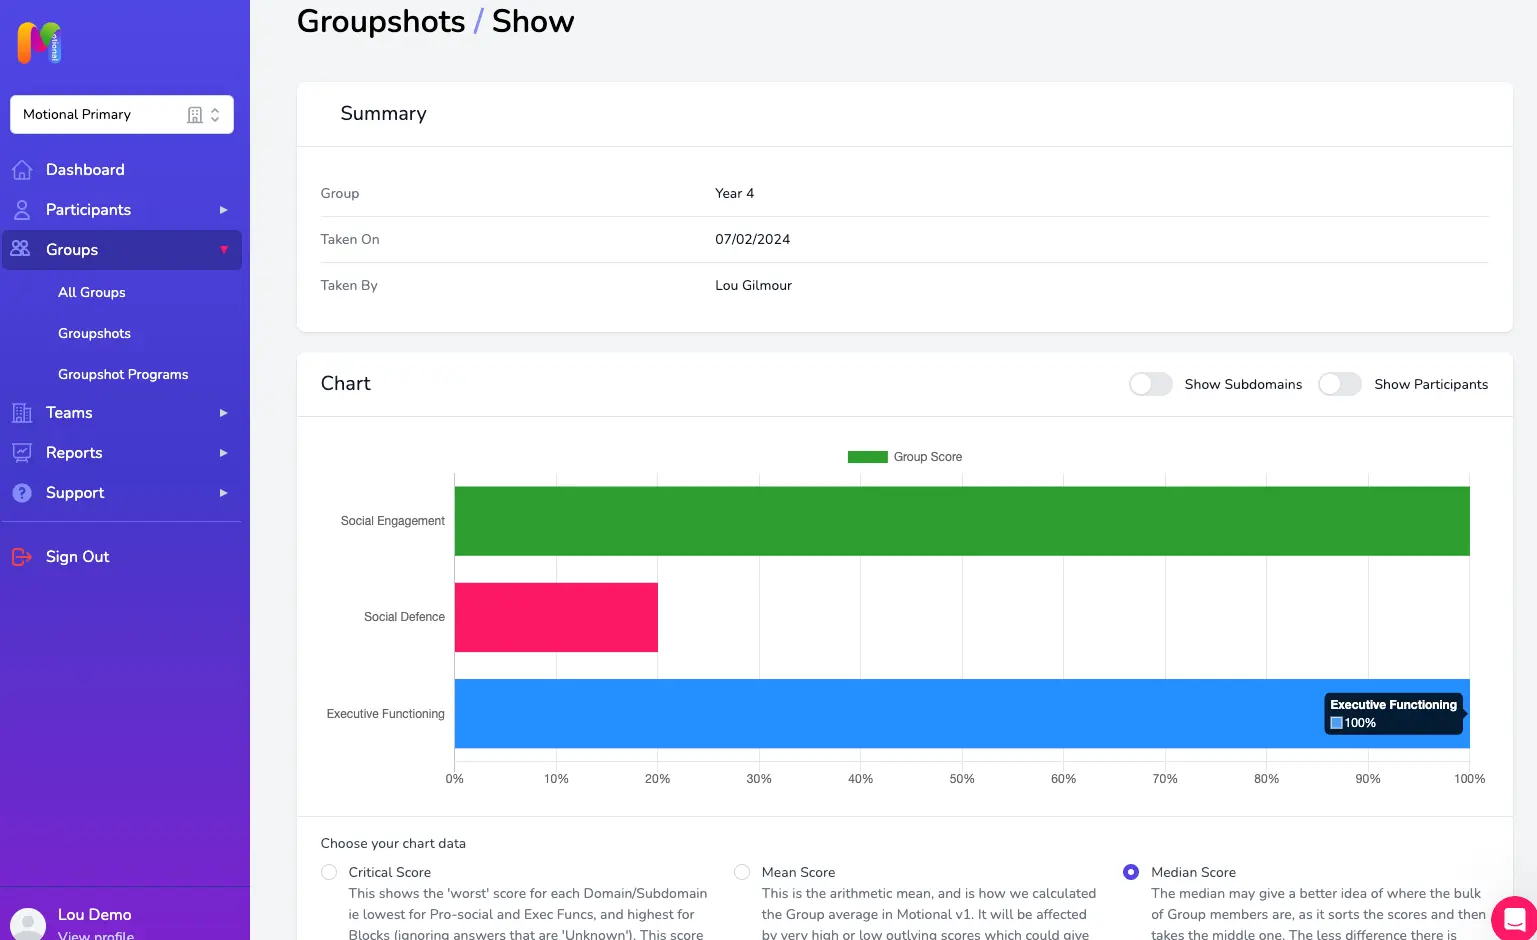
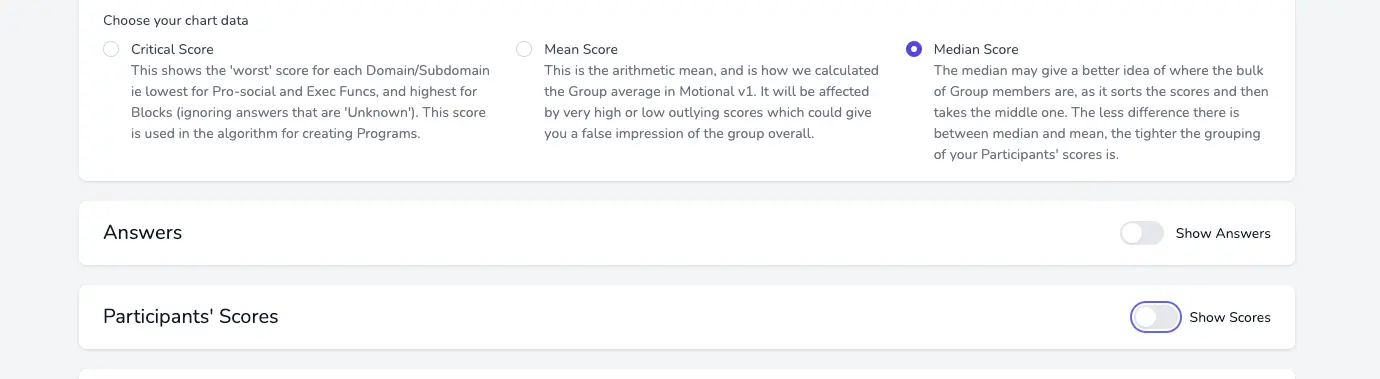
This is the average Domain (or Subdomain scores if you select that button) for the Group. You can view this by mean or median, and by lowest score in the Group (the differences are explained on the screen). By default we display the median here as this is less sensitive to outliers in the data and gives a truer perspective of the central tendency of the Group.
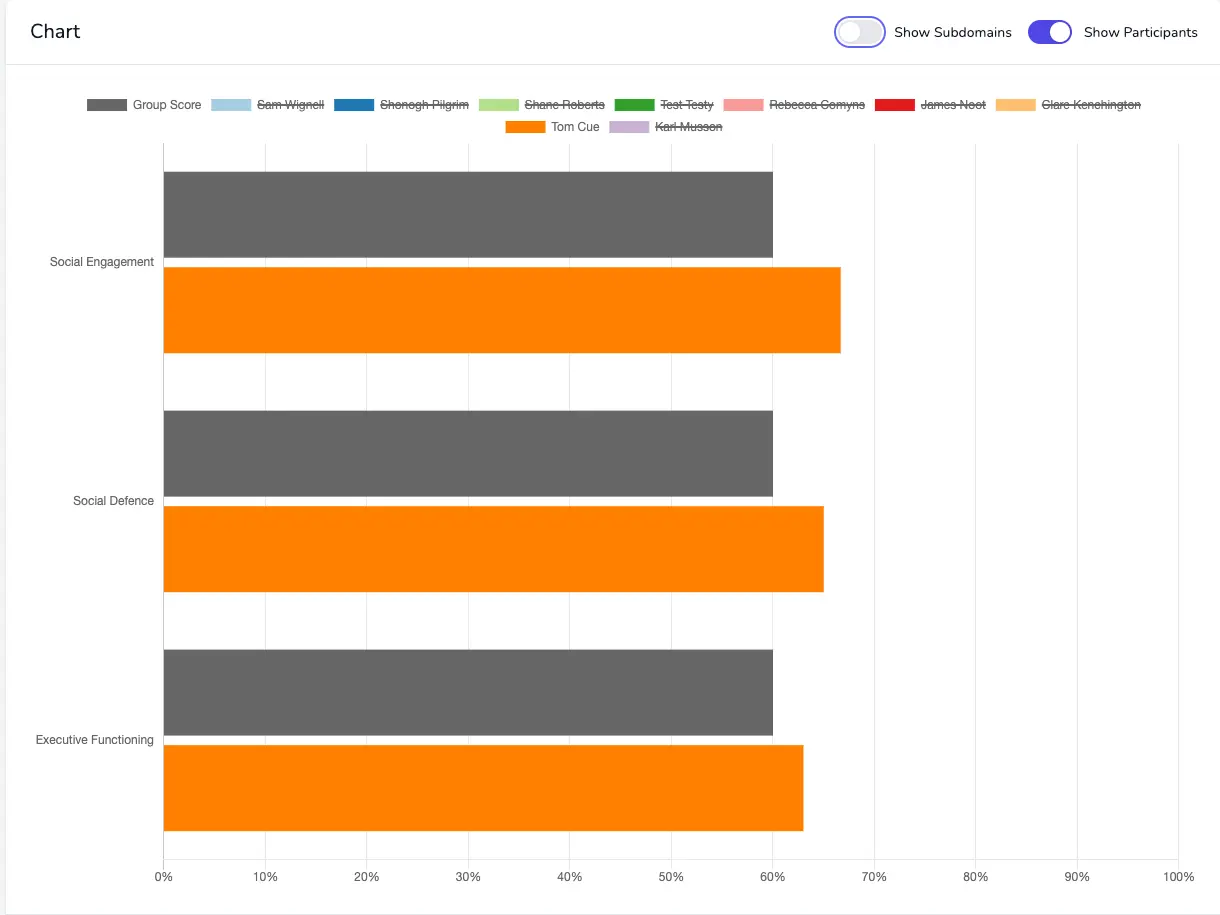
Using the Show Participants button will allow you to compare the individuals in the Group to the Group average score, like this:
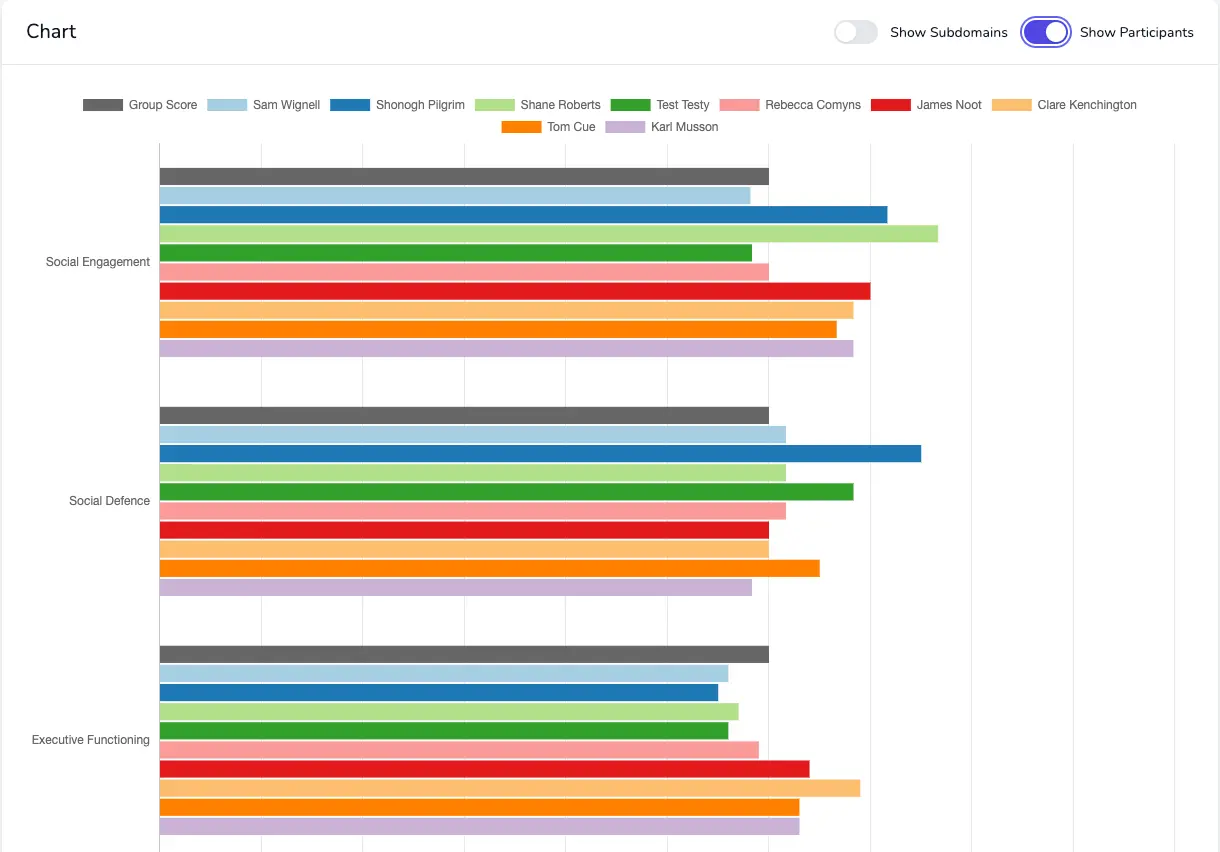
Clicking on the Participant names above the chart will bring them in and out of view, allowing you to compare each member of the Group to the Group average or Critical Score, and by clicking on the relevant buttons, at Domain or Subdomain level.
If you click on the Participants' Scores button you'll be able to view the results as a table.
Clicking on the arrows in the column headers allows you to sort by that column, for example if you wanted to sort the Social Engagement scores lowest to highest to give you an indication of who may need some additional 1:1 or small group support. You can choose which columns you include in the scores table using the column selector at the top right (the pink square with 3 dots):

Next Steps
Now you have created your new Groupshot, you can create a new Program for the Group.